
Onocoy Miner Setup: A Step-by-Step Tutorial 2025
Onocoy is a decentralized GNSS (Global Navigation Satellite System) network that started in 2021, delivering high-accuracy location services with centimeter precision. Unlike traditional GPS, which can be off by meters, Onocoy’s RTK (real-time kinematics) technology corrects satellite signals, making it valuable for autonomous vehicles, drones, agriculture etc.
By setting up an Onocoy miner, a GNSS reference station, you can contribute data to Onocoy’s network and earn tokens for it. Here’s how to set up an Onocoy miner.
What You’ll Need
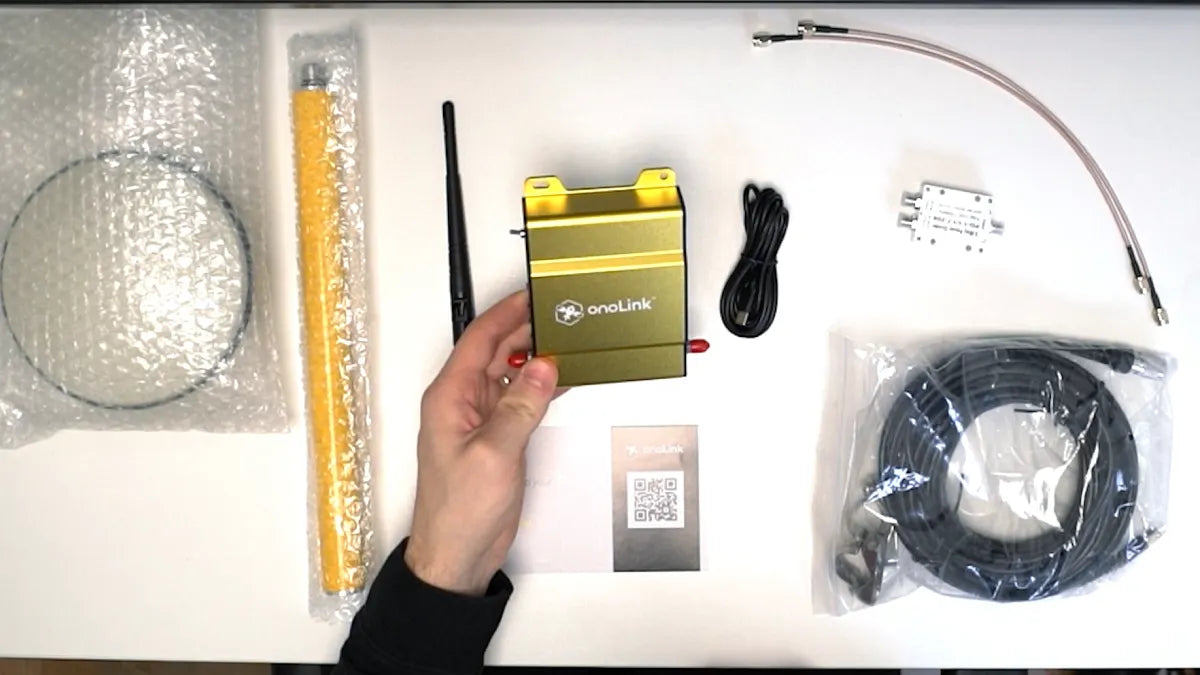
To get started, you’ll need the complete package bundle, which includes:
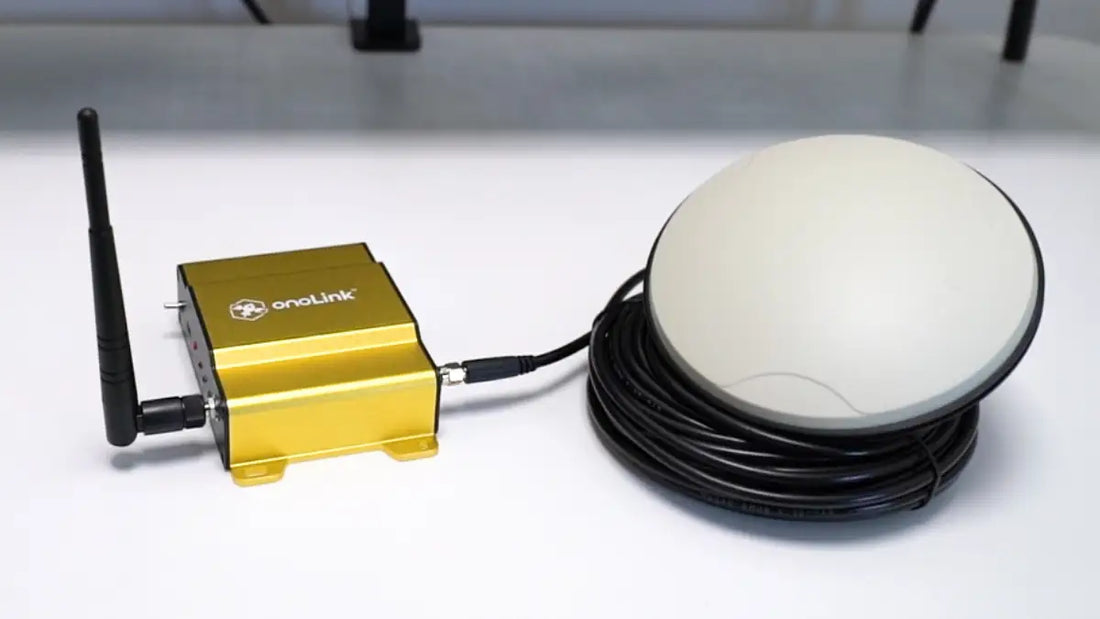
- Onocoy miner: The core device that connects to the network.
- GNSS Antenna: For capturing satellite signals.
- GNSS cable: To connect the antenna to the miner.
Best place to buy Onocoy miners
The cheapest place to purchase an Onocoy miner is at the following two places. The first is the Onolink miner. The second is the NTRIP-X.
Onocoy Miner setup video tutorial
How to setup the Onocoy miner
Ensure you have a clear sky view, like a rooftop, for the antenna and a stable Wi-Fi connection for the miner.
Step 1: Create an Onocoy Account
First, visit Onocoy’s explorer page to create an account. Once logged in, navigate to “Reference Stations” and select “NTRIP Credentials.” Click “Add new credential” to create a username and password for your specific station. Save these, as you’ll need them later. This credential username is unique to your station, and the password ensures secure access.
Step 2: Connect the Miner to Wi-Fi
Next, prepare the Onocoy miner. Attach the Wi-Fi antenna to the station and power it on. The miner creates its own Wi-Fi network, which you’ll use to configure it. On your phone or computer, search for available Wi-Fi networks and connect to the device name, mine was “onolink”.
Open a browser and enter 192.168.4.1 to access the miner’s admin settings.
- Toggle the “Wi-Fi” setting.
- Under SSID, enter your home Wi-Fi network name.
- Input your home Wi-Fi password.
- For security, set the admin settings to “Username/password” and choose a unique username and password to protect access to this page.
- Optionally, customize the miner’s Wi-Fi name and set a password to prevent unauthorized connections.
Step 3: Configure the NTRIP Server
In the same admin settings, toggle the “NTRIP server” option. Enter the following details:
- Host: servers.onocoy.com
- Port: 2101
- Username: The station credential username from the explorer page.
- Password: The password you created for this station.
Double-check your entries, then click “Apply.” The miner will restart, and a blue light should appear on the station, indicating it’s ready. If the light doesn’t show, ensure all details were entered correctly.
Step 4: Install the Antenna
Install the antenna in a location with a clear sky view, ideally on a rooftop. The best setup is to screw the antenna onto a metal pole to ensure stability. Run the GNSS cable from the antenna to the miner, connecting them securely. These setup steps are important, as the antenna’s placement directly affects data quality and token rewards.
Step 5: Monitor and Connect a Wallet
After installation, wait for the station to go online, which may take a few days for validation. Check the explorer page under “Reference Stations” for a status checkmark confirming the station is active.
To receive the ONO token rewards, connect a wallet (e.g., Phantom) on the explorer page. Click “Connect a wallet” and follow the prompts. Rewards depend on data quality and location, with up to three stations in a 15km radius earning full rewards.
Want the full scoop? Explore our Onocoy miner info Hub for everything you need to know.